JMeter has a very complex architecture that provides support for several inbuilt elements and allows extending the functionality of JMeter through plugins. It has many elements like Samplers, Processors, Listeners etc. In simple terms, different types of Elements represent the different features provided by JMeter.
In this topic, we will provide a brief overview of the most commonly used elements in JMeter and their features. In the subsequent topics, we will go into details of the elements and learn how to use them through practical hands on exercises.

TEST PLAN
A test plan is the top level body of JMeter, explains sequence of steps execute at run time. A final test plan made up of one or more Thread Groups, Sampler, logic controllers, listeners, timers, assertions, and configuration elements. Each Sampler can be preceded by one or more Pre-processor element, followed by Post-processor element, and/or Assertion element. It saves in Java Management Extensions (JMX) format.
Test Plan is the biggest element in Jmeter. It is often the root element in most steps performed and is at the top of the hierarchy in the Jmeter element architecture. 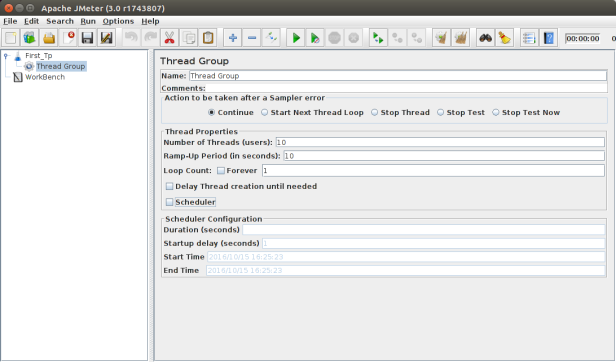
This is a screenshot of a simple Test Plan in Jmeter. We will read about the various other elements that we have added in a Test Plan in the segment below.
THREAD GROUP
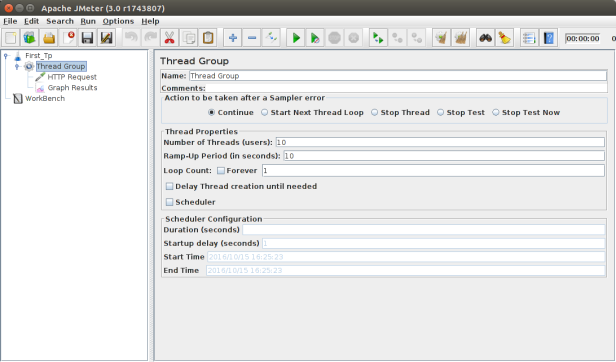
Thread Group is the most basic element of any Test Plan. It controls all the threads that JMeter uses to execute the test cases. Thread group elements are the beginning points of any test plan. All controllers and samplers must be under a thread group. Other elements, e.g. Listeners, may be placed directly under the test plan, in which case they will apply to all the thread groups. As the name implies, the thread group element controls the number of threads JMeter will use to execute your test.
If you mention 10 numbers of threads then JMeter will generate and simulate 100 user requests to the server under test.

JMeter allows Thread Group to be configured as follows:
- Simulate number of real users connected to the web server by defining the number of threads in Thread Group
- Set the duration within which all threads have to be run – called Ramp Up Period
- Number of times to execute each thread (each thread can repeat a certain number of times)
- Set the schedule to start the thread ( there is a check box named Scheduler to enable this option)
SAMPLERS
In order for your display anything on your system, the web browser must make a request to a server and then recieve the appropriate response and then process it. These requests are of various types and when we use Jmeter to mimic a user using his/her browser to make such requests, we need some elements which distinguishes between the type of request made. This is done by the Samplers, which is another one of the elements of Jmeter test plan.
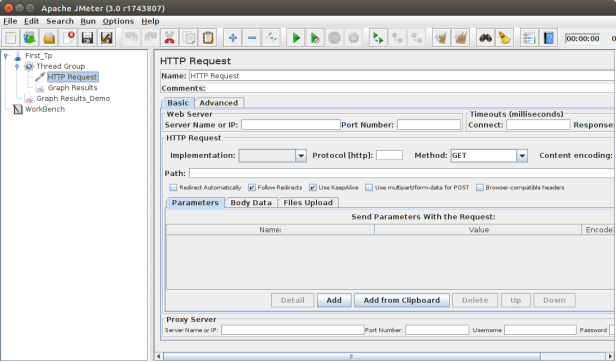
Samplers tell JMeter to send requests to a server and wait for a response. They are processed in the order they appear in the tree.Samplers facilitate JMeter to deliver explicit types of requests to the server. It simulates a user’s request for a page from the target server. So that, to avail POST, GET, DELETE functions on a HTTP service, user can add HTTP Request sampler.
There a different types of Samplers in a Jmeter Test Plan, which are provided by Jmeter . Some of them are – note that these are not all the samplers –
- FTP Request
- HTTP Request
- JDBC Request
- Java Object Request
- LDAP Request
- SOAP/XML-RPC Request
- SMTP
All of Jmeter’s built in Samplers are listed here with how they work. For a short hand explanation of the basic samplers, see this link.
LOGIC CONTROLLERS
Logic controllers are the second type of controllers, besides Samplers. Samplers help us creating the type of request – for example, the HTTP Request, wherein Logic controllers defines how to control those requests based on a logic such as setting the schedule to send that request, determine which request to be sent etc. Logic Controllers decide the order of processing of Samplers in a Thread.
Logic Controllers can change the order of requests coming from their child elements. They can modify the requests themselves, cause JMeter to repeat requests, etc.
Jmeter provides the following Logic Controllers –
- Runtime Controller
- IFController
- Transaction Controller
- Recording Controller
- Simple Controller
- While Controller
- Switch Controller
- ForEach Controller
- Module Controller
- Include Controller
- Loop Controller
- Once Only Controller
- Interleave Controller
- Random Controller
- Random Order Controller
- Throughput Controller
Jmeter manual page has a very good description of how the Logic Controllers would make a change in the working of a Jmeter test plan. This can be read here.
LISTENERS
After creating and sending the request to server, JMeter receives the results returned from the server. Listeners help users to access the server response and analyze the test results.
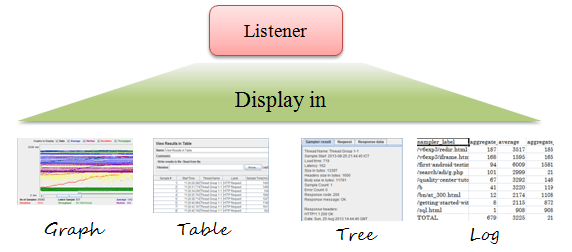
The test data can be presented in several formats such as Graph, Table, Tree View, Logs files etc. JMeter provides several listeners in order to capture and read the data in graphical, textual and tabular formats, among other.
Listeners offer a means to collect, save, and view the results of a test plan and store results in XML format, or a more efficient (but less detailed) CSV format. Their output can also be viewed directly within the JMeter console.
It basically adjusts anywhere in the test, moreover under the test plan, gather data only from elements at or below their level.
Listeners of JMeter provide these many things,
- Graph Results
- Spline Visualizer
- Assertion Results
- Simple Data Writer
- Monitor Results
- Distribution Graph (alpha)
- Aggregate Graph
- Mailer Visualizer
- BeanShell Listener
- Summary Report
- Sample Result Save Configuration
- Graph Full Results
- View Results Tree
- Aggregate Report
- View Results in Table
Important points to note about Listeners
- The data collected by all the Listener is the same. The only difference between the Listener is in the way the information is displayed.
- Listeners can be added at any level. The Listener will capture the data for the level at which it was added and the levels below it.
- You can add different Listener for each ThreadGroup in which case it will only capture data for that ThreadGroup
- Listener added to the Test Plan will capture data for the complete Test Plan and all Thread Groups in it.
- You can configure the data to be captured by clicking on the Configure button on the Listener.
- You can configure the Listener to capture the data in a file as a CSV or JTL by providing the filename and path for the file where the data is to be logged. This feature is available in every Listener.
TIMERS
In the real world, when a user visits a website on their browser, he/she must wait a certain amount of time until the website is completely loaded in the web browser before they can perform the next action.
To simulate this scenario, JMeter creates many HTTP requests to the server. By default, those requests are sent to server continuously without any delay between them. It may cause the server under test to overload and this may not portray the results seen in real life.
Therefore, you need to create a time delay between each request. JMeter offers elements called the Timer elements that you can use in such situations.
The purpose of Timer elements is to pause a JMeter Thread representing a virtual user, for a certain amount of time.
Jmeter provides the following types of Timers –
- Synchronizing Timer
- JSR223 Time
- BeanShell Time
- Gaussian Random Timer
- Uniform Random Timer
- Constant Throughput Timer
- BSF Time
- Poisson Random Time
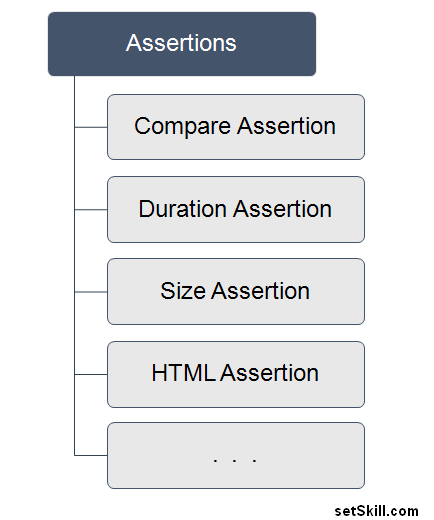
ASSERTIONS
Now, you HTTP Requests sent using Samplers, you can change the logic using Logic Controllers, you can pause the threads using the Timers- but how would you actually know that the results that you return from the server is actually correct and is what you needed. Here is when Assertions come into play. Assertions allow you to assert facts about responses received from the server being tested. Using an assertion, you can essentially “test” that your application is returning the results you expect it to.
Assertions are statements that verify the test results as either positive or negative. Assertions in JMeter can be applied to many elements such as Test Plan, Thread Group or Samplers.
CONFIGURATION ELEMENTS
Configuration elements are somewhat similar to what a settings menu or option would do in a tool. You can use this element to modify or change the requests that are going out of a Jmeter test plan. Configuration elements can be used to add or modify the param values of the requests generated via Samplers.
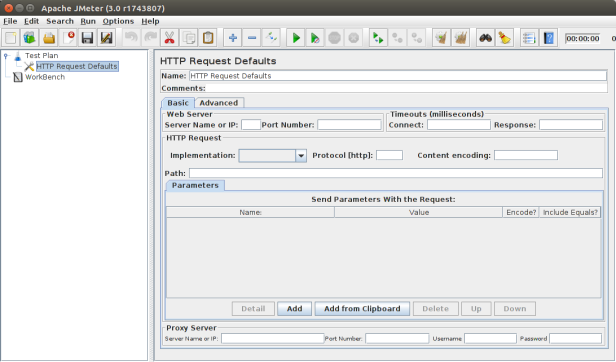
Example: Let us assume that you need to create a Test Plan with 20 HTTP Request Samplers to the same application but different paths to test different scenarios. By using HTTP Request Defaults Config Element, you only need to enter the common details once in the Config Element and you can skip them in the Sampler.
You will not need to enter the same details 20 time again in the samplers, all Samplers will inherit the HTTP Request Defaults properties.
As per the Jmeter manual page, A configuration element is accessible from only inside the tree branch where you place the element. For example, if you place an HTTP Cookie Manager inside a Simple Logic Controller, the Cookie Manager will only be accessible to HTTP Request Controllers you place inside the Simple Logic Controller (see figure 1). The Cookie Manager is accessible to the HTTP requests “Web Page 1” and “Web Page 2”, but not “Web Page 3”.
Also, a configuration element inside a tree branch has higher precedence than the same element in a “parent” branch. For example, we defined two HTTP Request Defaults elements, “Web Defaults 1” and “Web Defaults 2”. Since we placed “Web Defaults 1” inside a Loop Controller, only “Web Page 2” can access it. The other HTTP requests will use “Web Defaults 2”, since we placed it in the Thread Group (the “parent” of all other branches).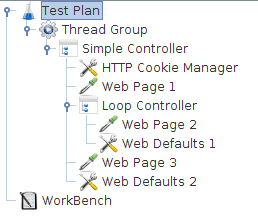
Pre-Processor Elements
A Pre-Procesor is an interesting thing which executes before a sampler executes. It is basically used to modify the settings of a Sample Request before it runs, or to update variables that are not extracted from response text.
These are the list made up of all the Pre-Processor Elements JMeter,
- JDBC PreProcessor
- JSR223 PreProcessor
- RegEx User Parameters
- BeanShell PreProcessor
- BSF PreProcessor
- HTML Link Parser
- HTTP URL Re-writing Modifier
- HTTP User Parameter Modifier
- User Parameters
Post-Processor Elements
A Post Processor gets executed after finishing a sampler execution process. This element is basically useful to procedure the response data, for example, to retrieve particular value for later use.
These are the list made up of all the Post-Processor Elements JMeter,
- CSS/JQuery Extractor
- BeanShell PostProcessor
- JSR223 PostProcessor
- JDBC PostProcessor
- Debug PostProcessor
- Regular Expression Extractor
- XPath Extractor
- Result Status Action Handler
- BSF PostProcessor
In the next step, we will learn about the scope of the elements and how the execution order affects how and when the elements are executed.
